How to Build Your Own AI Wardrobe (No, you don't need to know how to code)
Turn all the clothing pieces in your camera roll into a private digital closet that can style complete outfits for any occasion or aesthetic.
When I was in high school, I watched Clueless and saw Cher Horowitz use a computer to choose her outfit.
My first thought as a nerdy CS kid was: Wait. How does that actually work?
I wondered about it again and again for the next ten years.
Now we can finally make it.
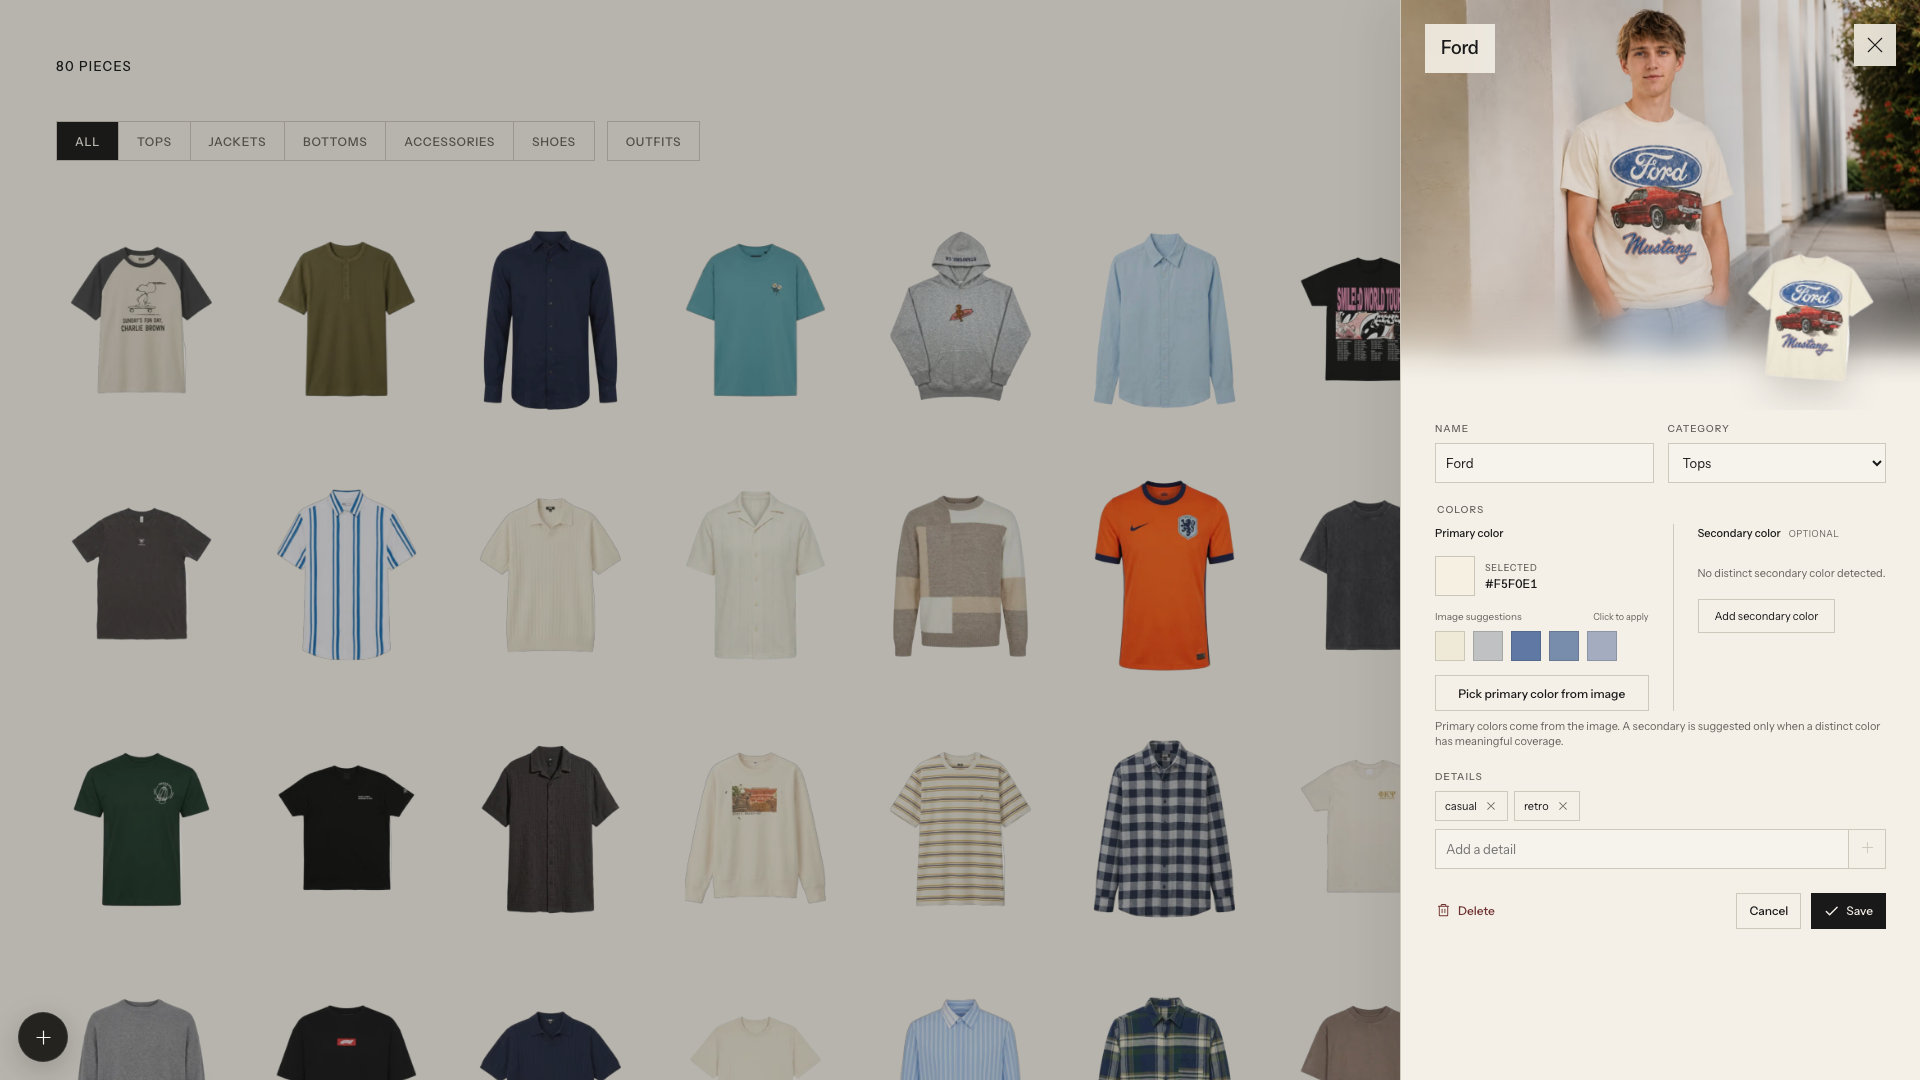
In this guide, I’ll show you how to build a private digital wardrobe from clothes you already own. You can give it regular photos from your camera roll—not pristine little product photos of every shirt you have ever bought—and it will separate the clothes, organize them, and help you generate complete outfits.
You do not need to know how to code. You do need to be comfortable following instructions, copying a few prompts, and occasionally telling the computer, “No, beloved, that is not what I meant.”
That is basically technology.
The short version: We are going to download an open-source project called Wardrobe, ask Codex to set it up, give it photos of our clothes, and then ask it to style outfits for a real occasion.
What you are making
By the end, you will have a local website that can:
- find individual garments inside your outfit photos;
- turn those garments into clean wardrobe images;
- organize them into categories like tops, bottoms, jackets, shoes, and accessories;
- save the wardrobe on your computer; and
- create modeled outfit ideas from clothes you already own.
The project is called Wardrobe. It is an open-source project from tandpfun, which means the code is public and you can make your own copy. The repository currently uses OpenAI models to recognize garments and generate the wardrobe and outfit images.
Wait. What is a repository?
A repository—or “repo”—is basically a project folder with an unnecessarily dramatic technology name.
It contains the website code, setup instructions, and all the little files the app needs. “Cloning” the repository just means copying that folder from the internet onto your computer.
See? You already understand GitHub more than you did thirty seconds ago.
What you need before starting
Gather these first so we do not reach Step 4 and discover that your best full-body photo is trapped on a phone with 2% battery.
- A computer. The app runs locally on your machine, not on your phone.
- Codex. We will use it to read the project and handle the technical setup. Start with the Codex app documentation if you have not used it before.
- Node.js 22 or newer. Node lets your computer run the app. You can get it from the official Node.js download page. If you have no clue whether you have it, that is fine. We will ask Codex to check.
- An OpenAI API key. Create one using the official OpenAI API quickstart. API usage is billed separately based on the models and images you generate, so check the current API pricing and set a spending limit you are comfortable with.
- One clear, full-body PNG of yourself. A mirror selfie can work. Use a photo where your body and clothing silhouette are easy to see.
- A folder of clothing or outfit photos. Old camera-roll photos are fine. You do not have to photograph every garment separately before you begin.
Important API-key rule: Your API key is a password. Do not paste it into a public post, screenshot, GitHub commit, or random chat. We will put it inside a private .env file that the Wardrobe project is already configured not to upload to Git.Step 1: Copy the Wardrobe project to your computer
Open Codex and start a new task. Paste this:
Clone this open-source repository into a new local folder named wardrobe:
https://github.com/tandpfun/wardrobe.git

After cloning it, open that folder as the working directory. Read the README, but do not change any files yet. Explain what the app does in plain English and tell me what it needs before setup.
Codex may ask for permission before running a command. Read the request, make sure it is operating inside your new wardrobe folder, and approve the expected setup actions.
You have now cloned a repository. Please add “software engineer” to your internal self-concept immediately. LinkedIn can wait.
Step 2: Ask Codex to check the setup
Next, paste:
Check whether this computer has Node.js 22 or newer and npm installed.

If a requirement is missing, explain exactly what I need to install and give me the official download link. If everything is ready, install the project's dependencies, copy .env.example to .env, and stop before adding any secret keys.

Do not read, print, or expose anything already inside .env.
What is happening here?
- Node.js runs the app.
- npm downloads the packages the app depends on.
.envis a private settings file for secrets like your API key.
If Codex says npm: command not found, Node.js is probably missing or your terminal needs to restart after installation. This is annoying, not catastrophic.
Step 3: Add your OpenAI API key privately
Go to the .env file inside the Wardrobe folder and add your API key after the equals sign:
OPENAI_API_KEY=your_key_goes_hereSave the file.
Do not put quotation marks around the key unless Codex or the project specifically tells you to. Do not send me your key. Do not send your key to your group chat. I love community, but there are limits.
The project’s default settings currently use one OpenAI model to understand the clothing photos and another to generate images. Those defaults can change, which is why the project README should always win if it disagrees with an old screenshot or tutorial.
Step 4: Add your reference photo
The app expects a PNG at:
data/model-reference.pngYou can attach your full-body PNG to your Codex task and say:
Use the attached image as my private model reference for this Wardrobe project. Save a copy at data/model-reference.png. Keep it local, do not add it to Git, and confirm the image is a readable PNG.Why does it need this?
When the app generates a styled preview, it needs a consistent visual reference for the person wearing the clothes. A clear, well-lit, full-body image gives it more useful information than a dark shoulder-up selfie taken at 1:14 a.m.
Your source image, wardrobe files, and generated database are stored in the local project’s data folder. The app still sends the necessary inputs to OpenAI’s API when it analyzes or generates images, so “local” does not mean “the images never leave your computer for processing.”
Step 5: Put your outfit photos in one folder
Create a folder somewhere easy to find, such as:
Pictures/wardrobe-photosAdd a small first batch—maybe 10 to 20 photos. Starting with 4,000 camera-roll images is technically ambitious and spiritually unwell.
Useful photos include:
- mirror selfies;
- full-body outfit photos;
- pictures where the garment is not covered by a giant coat or bag;
- multiple angles of a complicated item; and
- older photos containing clothes you still own.
You do not need to crop them first. The import workflow is designed to inspect a photo, identify the distinct pieces, and create individual wardrobe items.
Step 6: Import the clothes with Codex
The repository includes a Codex skill made specifically for importing clothes. In your Wardrobe task, use:
$import-clothes Import the clothes from ~/Pictures/wardrobe-photos, create modeled photos, and add them to this wardrobe.Replace ~/Pictures/wardrobe-photos with the actual folder containing your photos.
Codex should inventory the images, identify the garments, remove duplicates, generate clean cutouts, review the results, and add the accepted pieces to the wardrobe database. It may ask you questions when part of a garment is hidden or when it cannot tell whether two photos show the same item.
Answer those questions honestly. AI is powerful, but it cannot recover the back of a jacket from vibes.
If the import looks wrong
Try one of these:
- Use a clearer photo or a second angle of the item.
- Import a smaller batch so you can review it carefully.
- Tell Codex exactly which result is wrong: the color, cut, logo, pattern, category, or duplicate detection.
- Ask it to regenerate only the failed item instead of starting everything again.
Specific feedback works better than “this looks weird,” although “this looks weird” is emotionally valid.
Step 7: Run your wardrobe
Ask Codex:
Start the Wardrobe development server. Tell me the local URL, verify that the gallery loads, and do not deploy it to the public internet.The current project normally opens at http://localhost:5173.
localhost means the website is running on your own computer. It is a real website; it is simply not published for strangers to visit.
You should now see your clothes organized into a visual wardrobe.
Step 8: Ask it to style an outfit
Now we get to the part I actually wanted when I was fourteen.
The repo includes a second Codex skill for generating complete looks. Give it a number, an occasion, and a direction:
$generate-outfits Create 6 outfit ideas from my wardrobe for a nighttime coworking session. I want the looks to feel playful with a slightly preppy aesthetic. Use only clothes that exist in my wardrobe, explain why each combination works, and save the finished lookbook locally.You can replace that request with literally anything useful to your life:
$generate-outfits Create 5 outfits for a week of college classes in warm weather. I want to look intentional, but I need comfortable shoes and layers for aggressive classroom air conditioning.$generate-outfits Create 4 outfits for a tech conference. Make them memorable and creative without making me look like I am about to pitch a crypto startup.$generate-outfits Create 7 everyday outfits that use the clothes I wear least often. Keep the combinations realistic and do not invent any new garments.Good prompting here is not about sounding technical. It is about describing your real constraints: the weather, dress code, comfort, setting, mood, colors, shoes, and what you absolutely refuse to wear.
How the AI wardrobe works, in normal-person language
There are four layers:
- The repository supplies the app and its rules.
- Codex handles the computer work: reading the project, running the setup, organizing files, and following the included import and outfit skills.
- OpenAI’s vision and image models inspect your photos, isolate garments, and generate visual previews.
- Your local data folder stores the wardrobe library and the generated results on your computer.
The interesting part is not that one magical model “knows your style.” The system gives several tools a clear job, then saves the useful outputs in a structure the next step can understand.
That is how many practical AI products work. Not magic. A pipeline.
Common problems
“The importer is disabled.”
Check that both of these exist:
- an
OPENAI_API_KEYvalue inside.env; and - a PNG at
data/model-reference.png.
Then restart the development server.
“Codex cannot find my photos.”
Give it the complete folder path. On a Mac, you can drag a folder into Terminal to reveal its path. You can also attach the folder to Codex and ask it to identify the local location before importing.
“The generated person does not look like me.”
Use a clearer reference photo with your face, body proportions, and full silhouette visible. Then ask Codex to regenerate the failed previews while preserving your identity and the exact garment details.
“It changed the design of my clothes.”
Give it more visual evidence. Logos, unusual closures, layered outfits, and small patterns are difficult when the source garment is partly hidden. Ask it to preserve the exact color, construction, pattern, and text—and to omit details it cannot verify instead of inventing them.
“Will this cost money?”
The repository is open source, but it calls paid API models for analysis and image generation. Cost depends on how many items and outfits you generate and on the current model pricing. Start with a small batch, review your API usage, and set account limits before attempting your entire life’s wardrobe.
The bigger idea
Yes, you made a digital closet. Cute. Useful. Cher Horowitz would be sick with jealousy.
But the more important thing is what you just practiced.
You found an open-source project, brought it onto your computer, gave an AI agent a goal, connected the project to an API, supplied your own data, tested the result, and improved it with feedback.
That is not “pressing a button.” That is building.
The gap between I wish this existed and I made a version of it this afternoon is collapsing. Your job is not to memorize every command before you begin. Your job is to get specific about what you want, find the right building blocks, and stay curious long enough to connect them.
Ten years ago, I watched a fictional computer pick an outfit and wondered how it worked.
Now you can make your own.
Please tell me what occasion you ask it to style first. I need to know whether we are dressing for class, a first date, or the suspiciously specific “nighttime coworking session” that started this whole thing.
Take these with you
Resources
Wardrobe open-source repository
The project used in this tutorial, including its latest setup instructions.
OpenAI API quickstart
Create and securely configure the API key used by the app.
OpenAI API pricing
Check current model and image-generation costs before running a large batch.
Node.js download
Install the runtime required by the Wardrobe project.
Codex app documentation
Learn the basics of working with local projects and tasks in Codex.
No mysterious leftovers
Questions you might still have
Do I need to know how to code to build an AI wardrobe?
No. You need to be comfortable following instructions, copying prompts, and reviewing what Codex does. The guide explains the unfamiliar pieces as you go.
Can I use normal camera-roll photos of my outfits?
Yes. Clear, full-body photos work best, and extra angles help with garments that are layered or partly hidden. Start with a small batch so you can review the results.
Do my wardrobe photos stay private?
The project stores its wardrobe library locally on your computer, but the necessary images are sent to the OpenAI API for analysis and generation. Do not treat local storage as meaning the images never leave your computer for processing.
Does the AI wardrobe cost money?
The repository is open source, but its analysis and image generation use paid API models. Begin with a small photo batch, check current pricing, and set an account spending limit.
Discussion
What are you thinking?
0 comments
No comments yet. You could be the first person with an opinion, which has never stopped the internet before.